OpenAPI Specification or the most underrated feature
How would we work without an API? If you were debugging something right now, you would surely say “much better” 😉 But let’s face it, without an API, the modern e-commerce world wouldn’t work at all. And what do we do to make sure our API works the way we expect it to? How do we test our API? How do we validate our schema? When you first start out as a developer, you might not think about this, you might just be happy that your API works. Later, when other people want to use your API, you need to explain your API. You add documentation, but maybe you haven’t tested every case, or the API evolves and the documentation doesn’t include the latest things you’ve added. In this blog post, I’ll explain why you should care about the OpenAPI specification and how it can provide new functionality to your customers the developers. I’ll also explain why the OpenAPI specification is just the first step toward a bright API future.
Setup (Shopware 6)Link to this section
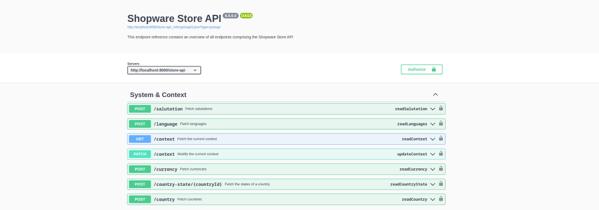
The Examples are coming from Shopware 6 source code. We are talking about OpenAPI Specification Version 3.1.0 here at the moment. When you want to generate the API schema JSON files you can do this in the Shopware context for the store API or the admin API . You need a running Shopware instance and then use these links:
**store API
**http://localhost:8000/store-api/_info/swagger.html (UI)
http://localhost:8000/store-api/_info/openapi3.json?type=jsonapi (JSON)
**admin API
**http://localhost:8000/api/_info/swagger.html (UI)
http://localhost:8000/api/_info/openapi3.json?type=json (JSON)
In the UI (User Interface) you can also set the data that is needed for authorization. And then you can Import this JSON to Postman, Insomnia, AdvancedRestClient, or whatever you use.
OpenAPI Specification ExampleLink to this section
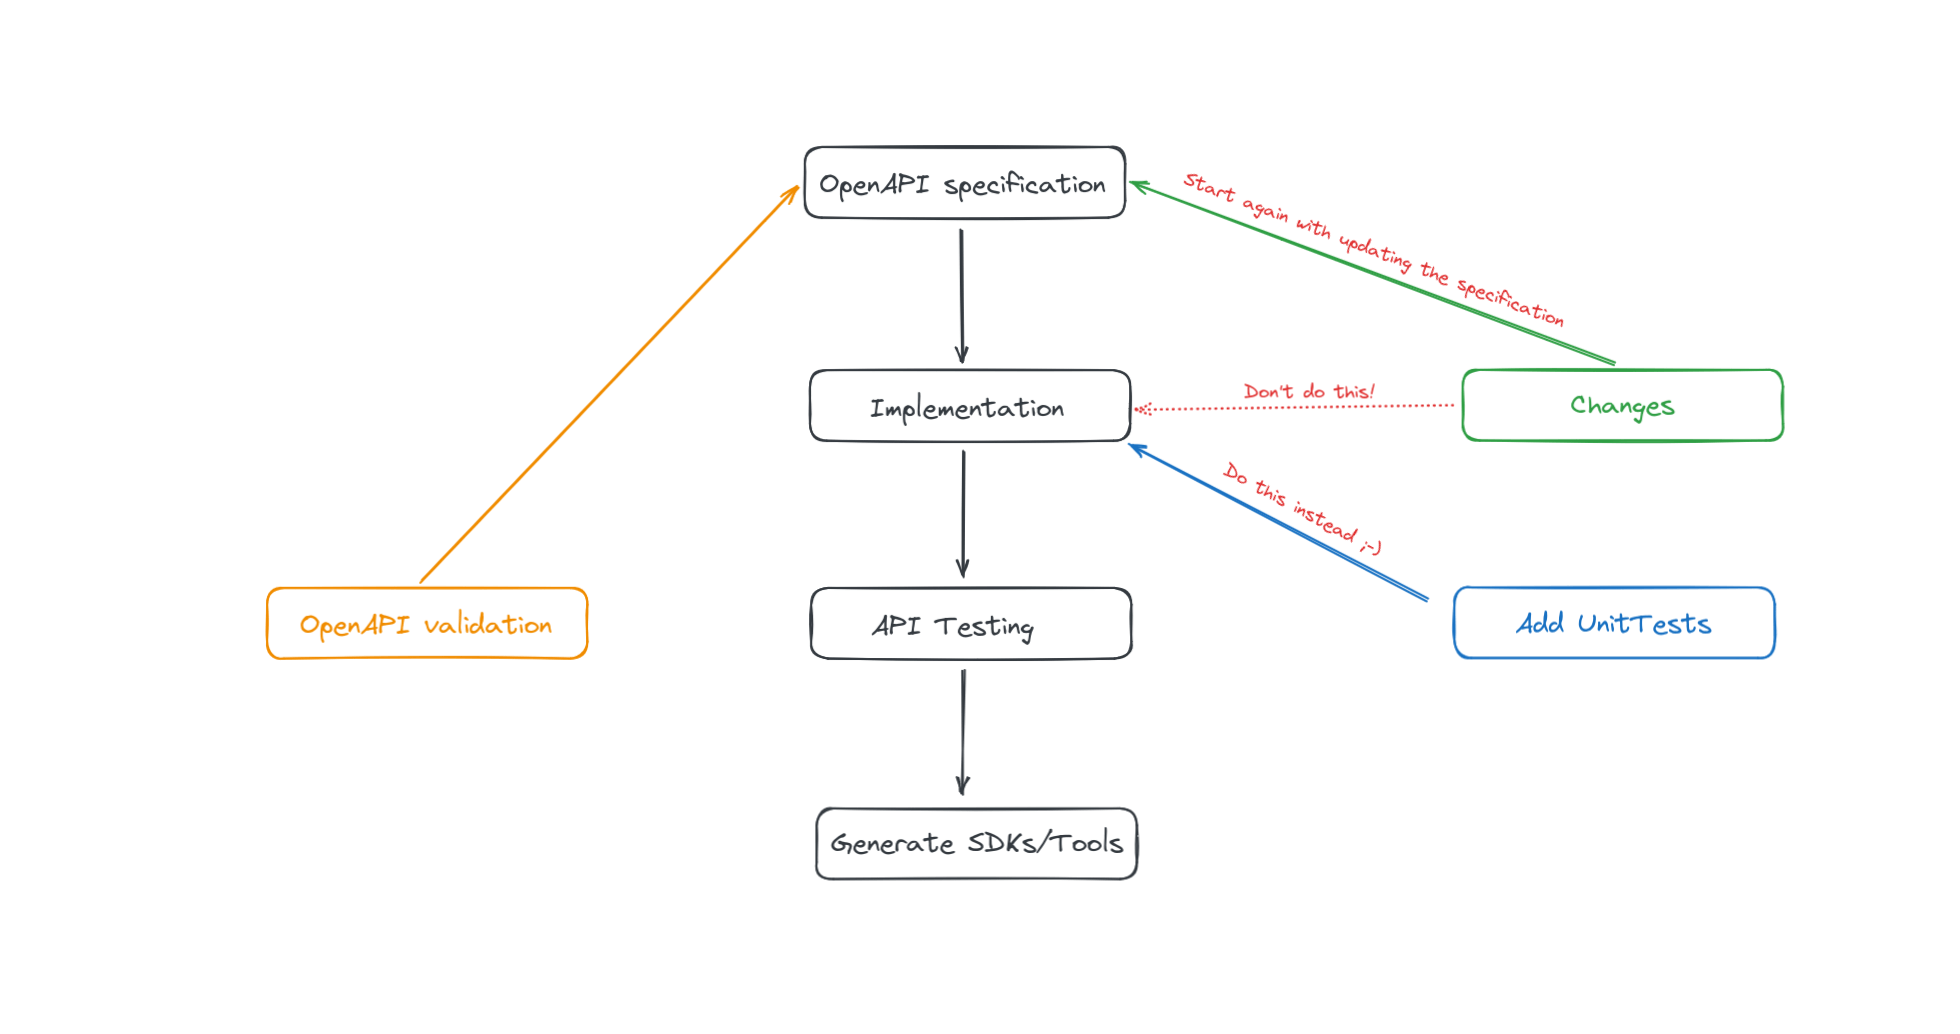
In our example, we will look at the store API and the route to add some items to the cart. The following PHP code is the actual Symfony-based implementation for this store API endpoint: /store-api/checkout/cart/line-item. Now that we have the code running with all its objects, parameters and return values, we need to define the same in the OpenAPI specification. If you have enough experience, you should start with the specification and not with the actual implementation. And please remember, if the implementation changes, you need to update the OpenAPI specification as well.
/**
 * @param array<LineItem> $items
 */
#[Route(path: '/store-api/checkout/cart/line-item', name: 'store-api.checkout.cart.add', methods: ['POST'])]
public function add(Request $request, Cart $cart, SalesChannelContext $context, ?array $items): CartResponse
{
    if ($items === null) {
        $items = [];

        /** @var array<mixed> $item */
        foreach ($request->request->all('items') as $item) {
            $items[] = $this->lineItemFactory->create($item, $context);
        }
    }

    foreach ($items as $item) {
        if ($request->getClientIp() !== null) {
            $cacheKey = ($item->getReferencedId() ?? $item->getId()) . '-' . $request->getClientIp();
            $this->rateLimiter->ensureAccepted(RateLimiter::CART_ADD_LINE_ITEM, $cacheKey);
        }

        $alreadyExists = $cart->has($item->getId());
        $cart->add($item);

        $this->eventDispatcher->dispatch(new BeforeLineItemAddedEvent($item, $cart, $context, $alreadyExists));
    }

    $cart->markModified();

    $cart = $this->cartCalculator->calculate($cart, $context);
    $this->cartPersister->save($cart, $context);

    $this->eventDispatcher->dispatch(new AfterLineItemAddedEvent($items, $cart, $context));
    $this->eventDispatcher->dispatch(new CartChangedEvent($cart, $context));

    return new CartResponse($cart);
}
So the goal of the OpenAPI specification is that we have a platform-agnostic way to define how the API can be used. And it also describes the objects, types, parameters, and return values. So in theory you only need this specification to understand how to use the API. The good thing is also when you open this JSON file in your editor you can jump around and look at the objects what they contain and how they are structured.
If you look at this JSON below, you see the URN (Uniform Resource Name) for the route, you see the requestBody with the content you need to send, and you see the responses also with the content part containing the Cart object. But you don’t see the “items” parameter that is required for the CartItems object. To know this parameter, you need to refer to the CartItems schema (scroll down).
"/checkout/cart/line-item": {
      "post": {
        "tags": ["Cart"],
        "summary": "Add items to the cart",
        "description": "This route adds items to the cart. An item can be a product or promotion for example. They are referenced by the `referencedId`-parameter.\n\nExample: [Working with the cart - Guide](https://developer.shopware.com/docs/guides/integrations-api/store-api-guide/work-with-the-cart#adding-new-items-to-the-cart)",
        "operationId": "addLineItem",
        "requestBody": {
          "content": {
            "application/json": {
              "schema": { "$ref": "#/components/schemas/CartItems" }
            }
          }
        },
        "responses": {
          "200": {
            "description": "The updated cart.",
            "content": {
              "application/json": {
                "schema": { "$ref": "#/components/schemas/Cart" }
              }
            }
          }
        },
        "security": [{ "ApiKey": [] }]
      },
      "delete": {...},
      "patch": {...},
}
Look at the CartItems schema and its properties (there is only one). You now know that wherever the CartItems schema is used, you need to set the “items” property, which is an array of LineItems. If you keep scrolling, we’ll look at the LineItem schema.
"CartItems": {
  "allOf": [
    { "$ref": "#/components/schemas/ArrayStruct" },
    {
      "type": "object",
      "properties": {
        "items": {
          "type": "array",
          "items": { "$ref": "#/components/schemas/LineItem" }
        }
      }
    }
  ]
},
Surely you will wonder why I should define this JSON and its objects. Look at the LineItem, each property is defined with its type, so you know the specification in detail, which is great because this is called the OpenAPI specification. Let’s move on to how we can validate our schema and also test our API because these are completely different things.
"LineItem": {
  "type": "object",
  "properties": {
    "id": { "type": "string" },
    "referencedId": { "type": "string" },
    "label": { "type": "string" },
    "quantity": { "type": "integer", "format": "int32" },
    "type": { "type": "string" },
    "good": { "type": "boolean" },
    "description": { "type": "string" },
    "removable": { "type": "boolean" },
    "stackable": { "type": "boolean" },
    "modified": { "type": "boolean" }
  }
},
Validate and Test your APILink to this section
As developers, we want to make sure that the OpenAPI specification is valid, and we also want to test our API to see if it works as expected. In a perfect world, we would like to combine these two things into one process, such as testing and validating responses, parameters, and so on.
There are many tools out there and I don’t want to tell you what to use because I don’t know your use case. But remember that nothing is perfect and sometimes it is easier to split things up. For example, separate validation and separate testing. So I would recommend integrating a validation process as a quick win and then creating a test suite. Maybe one day you will have a lot of experience and then you can try to combine these things or try this in a POC (could be the next blog post *:*thinking-face:). The linked tools below have a very different feature set so maybe do not look only at the language you already know. Choose your path wisely.
Resources
- OpenAPI.Tools
- OpenAPI HttpFoundation Testing
- Playwright API Testing
- Why you should adopt API design-first principles
Next Level API SDKsLink to this section
Why do we add so much boilerplate code? Just for validation and testing? I mean, that would be a very good reason too, if that was the only reason. But there is more to explore. Because when you have a clean OpenAPI specification and a battle-tested and fast API, it’s time to use this to create new SDKs or tools that can be used in different languages and systems (CI/CD/ERP).
We at Shopware have used this to create an API client that is automatically generated by the OpenAPI specification and can be used in TypeScript with auto-completion. This will help developers a lot as they don’t need to know the Shopware 6 store or admin API in detail, they can just use it. And if they miss a parameter, TypeScript will point it out to them. Also, if you have a customer with custom endpoints, you can use the generate command to create a TypeScript definition based on the customer instance. You can also extend objects, routes, and so on without having to create your own TypeScript definition file. More details can be found in the README of the API client, but you can also expect a blog post with more examples and details soon. 🚀
TL;DRLink to this section
- Create OpenAPI specifications for your API
- Validate your OpenAPI specification file
- Create a test suite to test your API
- Use your OpenAPI specifications to generate tools, SDKs, etc.
- In Shopware 6 Context use the new API client for store API or admin API